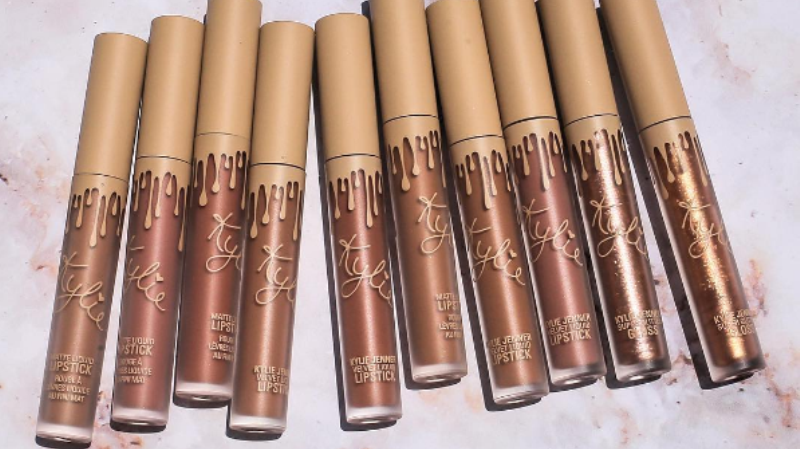
Let’s be honest, liquid lipstick is one ingenious creation that has changed the world of makeup forever. It is smooth, easy to apply, comes in all possible shades that normal wax lipstick comes in and looks so totally gorgeous on the lips. However, if you are struggling with the knowledge of how to apply liquid lipstick, or the lack of it therefore, there are chances that you are doing it wrong.
Even though liquid lipstick is a marvelous creation, it can be a little difficult to handle if you don’t know exactly how to apply liquid lipstick. Because of the liquid formula, it shifts around more than normal lipstick, and chances are, that before you can get that perfect pout, you will get lipstick all over your face, mouth, chin, and a lot of other places. If you are wearing a dark lipstick, then it is pretty difficult to get it off places that you wouldn’t want lipstick to get, without ruining your other makeup. This whole fiasco can be avoided, if you know exactly how to apply liquid lipstick like a total professional. Here is a step-by-step guide that is super easy to follow, even if you are a beginner.
Suggested read:The Ultimate Step-By-Step Guide On How To Apply Lip Gloss
STEP 1: Lip care
The first thing you need to do is make sure that your lips are well-prepared to take on your liquid lipstick. Even though these lipsticks are well, liquid, they tend to stay on for a really long time because of their super-fast drying ability and they also tend to draw moisture from your lips and dry them out.
Adding a protective layer on your lips before you apply liquid lipstick can help you overcome this problem, and give you long-lasting effect without worrying about chapped lips. Here are the steps for soft, liquid lipstick ready lips!
Exfoliation: Exfoliating your lips is the first step to getting pink, soft lips for your liquid lipstick. The process nit only helps you get rid of the dead and dry cells that are stuck to your lips, but it also gives your pretty, plump, lips which enhance the effect of your liquid lipstick, and makes it look super good. You can exfoliate with a homemade natural scrub of sugar, lemon juice and honey, which is both course and moisturizing.
Moisturizing: You have to moisturize your lips so that your lipstick doesn’t leave your mouth dry after a couple of hours. However, you have to be careful not to moisturize too much, because it could make your lipstick slide around more easily. Try to dab on a little cream to make sure that your lips are hydrated and moisturized.
Lip balm: The final lip care step is to apply a teensy bit of lip balm to make your lips firm and ready for your lipstick. It is always better if you apply a wax-based lip balm, which is a protective layer and also a stable base for your lipstick to stay on and slide on a little less than it otherwise would have.
STEP 3: Gather the things you’ll need
Once you lips are prepped and ready to be made up, gather your things, so that the actual application process is simple. It is better to be equipped with t eh things you need from beforehand, so that you don’t miss a single step, and your lips look perfect every time. You will need:
- Concealer
- Foundation
- Lip primer
- Lip liner
- Beauty blender
- Paper towel
- Thin lipstick brush
- Liquid lipstick
Suggested read: Dark Lips Don’t Care! A Step-By-Step Guide On How To Apply Lipstick On Dark Lips
STEP 3: Prepping the base of your lips
After moisturizing and ensuring that your lips are soft and ready for your lipstick, you have to build up the base on which your lipstick will stay. This includes the first layer of makeup before your lipstick goes on, so that your color stays in place, has a long-lasting effect and pops on your mouth, without the color being altered in any way. Here is what you need to do.
Concealer: The first thing you need to do after you have applied lip balm and moisturized your lips, is apply a little concealer with your beauty blender. This helps remove all those fine lines and grooves and edges into which your lipstick could easily leak into and look uneven. It smoothens out your lips for the perfect application.
Foundation: After concealer, it is always best if you dab on some foundation in the same shade as the rest of your face. If you have dark lips, or even the slightest tint in your natural lip color then it might affect the real color of your liquid lipstick. Foundation ensures that the real color of your lipstick comes through every single time, no matter what the natural color of your lips is.
Lip primer: Even though you can do without this step, it is always better if you prime your lips, because it can work wonders in ensuring that your lip color stays on for the longest time. Even liquid lipstick, which is sought after because of its long-lasting properties can fade after a couple of hours. a thin layer of lip primer ensures that you have flawless color, for hours on end.
STEP 4: Contour your lips
To make your lips look plump and full without reaching out for those lip enhancers and needles, all you need is your lip liner. To do this, apply a thick line of lip liner along the natural lining of your lips and bled it in towards the centre. Make a small ‘X’ on your cupid’s bow which reaches down the centre of your lips, and draw three parallel lines on your bottom lip in an up-down fashion. Blend these out slightly with your lipstick brush, or you can even fill your lips in with your liner for you to be able to see visible effects.
STEP 5: Apply liquid lipstick
After all this extensive preparation, comes the part where you actually put on your liquid lipstick. Start applying from the centre of your lips to the edges on both your upper lip and your lower lip, and make sure you apply even pressure while applying. Because liquid lipsticks come with wands of their own, the application is relatively easy and precise, so you shouldn’t have too much trouble keeping it within the lines once you have your liner on.
After you have applied the first layer, before it dries quickly press a paper towel lightly to your lips, so the excess lipstick gets transferred onto the paper, and you are left with a dry, perfect layer of liquid lipstick on your gorgeous lips.
STEP 6: Fix the edges
No matter how careful you are, you will always run the risk of bleeding lipstick all over your face, unless you clean up your edges properly. The best way to do this is by taking your thin lipstick brush and applying a thin layer of concealer all around your lips’ natural lining. This creates an extra layer of protection to prevent bleeding and leakage.
SOME HANDY TIPS
Now that you have the intel on how to apply liquid lipstick like an absolute pro, here are some extra pointers that could make your job infinitely easier and more lucid.
Suggested read: 15 Gorgeous Matte Lipstick Shades You Simply Can’t Do Without!
- Don’t layer your lipstick – Thing with liquid lipstick is, one layer is more than enough to get great results. Extra liquid lipstick can be a rookie mistake, which might make you look over the top and garish, and also increase the chance of leakage.
- Don’t pucker and rub your lips- usually, the rule with lipsticks is that you rub your lips together and pucker, so that the pigment is spread evenly. With liquid lipsticks however, try to avoid doing that, as it could have the exact opposite effect.
- Never put lip balm over your lipstick: lip balm has a formula that tends to break down the texture and color of liquid lipstick, which means layering balm over your lipstick, can lead to a patchy and faded color. In order to keep your lips soft, always apply lip balm as a layer under your lipstick.
- Equip yourself with a good makeup remover- Liquid lipstick is pretty resilient when it comes to application, and won’t budge at all once it is dry. In order to remove any mistakes or bleeding, you can’t rely on your paper towels. Carry around a good makeup remover to keep your liquid lipstick under control.
Once you are aware of the fundamentals of applying liquid lipstick, there is nothing stopping you from making your lips look as good as any other professional makeup artist!
Feature image source: Instagram
