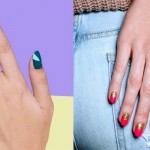
If you love the edgy nail art designs pinned on various social media platforms, but find it rather challenging to try them on your nails, then you might be in need for some nail art accessories, which will make the whole process easy-peasy for you.
Did you know that the art that you create on your nails speaks volumes about you? It is, therefore, essential you make a statement using the right accessories needed. With these, you can create all sorts of nail art designs; from minimalist ones to one that resembles a shattered glass effect.
Suggested read: The All-Round Guide For Choosing The Best Nail Strengthener
To set the ball rolling, we have curated a list of nail art accessories you need to glam up your nails like the ones you see on Instagram.
Must-have accessories for nail art designs
1. A topcoat
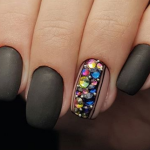
If you are a fan of the non-glossy finish, then you need a matte topcoat for yourself. Some suggestions include Revlon Colorstay Gel Envy Diamond Top Coat, Essence Gel-Look Plumping Top CoatLondontown Gel Genius Top Coat, Caption Top Coat, and Sally Hansen Gel Shine 3d Top Coat.
2. Nail polish remover pads for glitter polishes
If you are still living in the ‘90s, and like glitter!!! I’m sorry, I am just kidding. If you are a glitter person, then you might already know how difficult it is to get them off using a normal cotton pad, right? Well, the good news is, there is something called textured pads that you can invest in. When swiped off gently, these pads help remove even the grittiest of glitter in no time.
We suggest you try the 32 Pcs/box Nail Art Polish Remover Pads BORN PRETTY Flavor Wet Wipes Paper Towel.
3. Nail polish corrector
A nail polish corrector is a very good investment, especially for people like me who are not a pro nail artist. If you end up with a blob of nail polish around the nail bed, then but a nail polish corrector and clean that up to get a pro-like finish.
A nail polish corrector comes in the form of a pen, and therefore, it can give you that precision which a nail polish remover pad cannot. We recommend you try OPI CORRECT & CLEAN UP CORRECTOR PEN.
4. Transfer foils
Using foil paper is a really fun way to create cool designs. In case you don’t know how, you paint your nails the base color that you want. Then, apply clear glue on top of that and press the foil on it, after which, you need to pull the tape away quickly. This will leave behind traces of the foil, which give an embossed look to your otherwise boring base color.
Try Etsy Transfer foil and any nail adhesive glue of your choice.
5. Nail polish repair formula
If you like wearing false nails (because why not!?), then there is a high chance that your nails become dry and brittle very fast. In such cases, it is a great idea to give your nails a break for a week. Just apply a formula at night that will help you restore the health of your nails. Try the Perfect Formula Repair Coat for the entire week that you are planning to go nail polish-free.
6. Striping tape
A stripping take is a thin metallic tape that is used to improve one’s nail art design. It can also be used to press on the nails to create a design of straight lines. For the latter, follow the same guidelines as you did for transfer foils.
7. Dotter tool
This nail accessory can be used to create tiny dots your nails to give them a polka design. You can also have large dots, if you want. It is undoubtedly, the simplest and the best way to create polka dot nail art design.
8. Loose glitter
If you don’t have a loose glitter in your manicure kit, then you are not doing your mani right, my friend. This glitter, which you can find in any craft store, need t be sprinkled on the base nail color of your choice while it is still wet and see the magic happen. For a more ombre effect, sprinkle a big dose of the glitter toward the tips of your nails.
9. Striper Brush
A striper brush is way easier and more professional that a thin paint brush, which might be difficult to handle considering that your canvas is a little nail! So invest in this brush, and you can create all those thin, intricate lines to make a nail art design of your choice. You need to clean the brush every time using a nail polish remover before dipping it into a different color.
Suggested read: 8 Best Matte Nail Polish Shades That You Need To Own NOW!
10. Studs
For 3D embellishments, you can try tiny metallic studs. You can also go for circles or colored crystal domes. We, personally like, dazzling shavings that look great at every party.
11. Pearls for your nails
If you want something subtler, something that spells class, then you can try domed pearls for your nails. You can also go for clear crystals that look great on nude base nail color.
12. Nail wraps
For people who are either too busy to create nail art designs or simply suck at it, there is an easier way. These nail stickers come in a plethora of awesome designs that you can press on your nails and turn the heat on.
13. Nude nail polish
If you like keeping this sophisticated, then we are sure you like nude polishes. Also, did you know, nude nail polishes help create an illusion of longer nails? Hmm something to think about, eh!?
Here are the ones that we would suggest you to buy Sally Hansen Complete Salon Manicure in Shell We Dance?, Chanel nail polish in Ballerina, and CND Vinylux nail polish in Romantique.
14. Metallic nail polish
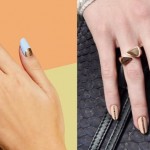
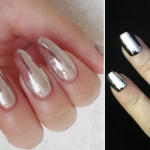
Try the nail polishes that come in metallic shades of gold and purple, mermaid blue, rose gold, silver etc. These are the new nudes, and if you are not trying them in 2018, well, then it is a waste.
We recommend to you 3CE Nail Lacquer in #bk03, RMS Beauty Nail Polish in Luminizer, Marc Jacobs Beauty Enamored Hi-Shine Nail Polish in Gatsby, and Christian Dior Diorific Vernis in Golden.
15. Pastel nail polish
Airy and light, these colors look lovely during all seasons, but they do look best in spring. If you are really into nude nail art, then you got to get your hands on these.
The shades we suggest are Essie Ballet Nudes Gel Couture in “Perfect Posture,” YSL La Laque Couture Matte Nail Polish in “Le Fuschia,” Nail Polish in “Auspicious,” Smith & Cult Nail Polish in “Cut the Mullet,”and Revlon ColorStay Gel Envy Nail Enamel in “Roll the Dice.
16. Glitter nail polish
Glitter is, undoubtedly, the easiest polish to apply, but very hard to remove. That’s the reason why we started with the remover which features on top of the list.
To get a more ombre effect apply more of the paint on the nail tips and less on the body of the nail.
To make sure that your nails look good in the nail art designs you try on them, you need to take care of them. Here are some tips from the American Academy of Dermatology,
-
“Trim nails after taking a bath or shower. Nails are softer then, so trimming is easier.
-
Use a nail clipper or nail scissors to trim nails.
-
Cut fingernails almost straight across. Round a little at the corners to keep the nails strong.
-
Cut toenails straight across. This reduces the chance of getting an ingrown nail.
-
Smooth rough edges with a nail file or emery board. Always pull the file across the nail in the same direction. Filing back and forth can weaken nails.
-
Leave the cuticles alone. Cuticles protect the nail root, so it’s best to not cut or push back the cuticles.”
Suggested read: The Best Long Lasting Nail Polish Brands That Will Stay On Forever
That is all we have on today’s post on nail art accessories that you need to bet on in 2018. Was this helpful?
Will you be recommending it to others too? If you have makeup queries regarding nail care that you would like to share with us, then please do so in the comment section below. Our experts will get back to ASAP.
You can also subscribe to our newsletter to receive these articles in your inbox every day.
Featured image source: Instagram


